
Designing an A-Frame in Sketchup: Part 1, The Floor
Designing that which supports our weary feet.

This marks a new series, where I’ll be “building” a cabin in Sketchup as detailed as I can. In this series, I’ll document my process of designing a simple A-Frame step-by-step in Sketchup to showcase the importance of not rushing the design process, even with simple concepts.
The full article is available without a subscription here
The A-Frame that I’m designing is meant to be just under 120 square feet, which is smaller than most permitting requirements and is practically a shed. This A-frame will be insulated.
In this issue of the series, I’m starting with a detailed account of how I designed the floor.
Why Am I starting with the floor and not the foundation?!
A good question.
The reality is, that this design is quite simple and one could decide on a multitude of different foundation types. Even further, the type of foundation that you decide on is dependent on so many factors such as:
The type of soil you have,
The frost depth in your region,
How big your cabin is,
How permanent you want the structure to be, and
What the cabin will be used for.
Given that the readers of Cabincore span 47 states (at the time of writing this) and at least five different countries with countless geological conditions, I figured that it was best to leave the foundation issue alone.
So the Sketchup “Build” series will start with the floor.
Here are some things you’ll find in this post:
A materials/cost list Excel sheet
Detailed screenshots of each step from Sketchup
How I’m designing the frame
How I’m insulating the floor
How I’m sealing off the floor to avoid mold issues
How I’m preventing (or slowing down) creatures and pests from infiltrating the cabin from below.
Many of these tips and tricks are some things that I have learned from one of my favorite books when trying to design a cabin, The Visual Handbook of Building and Remodeling, by Charlie Wing. You can get a copy here.
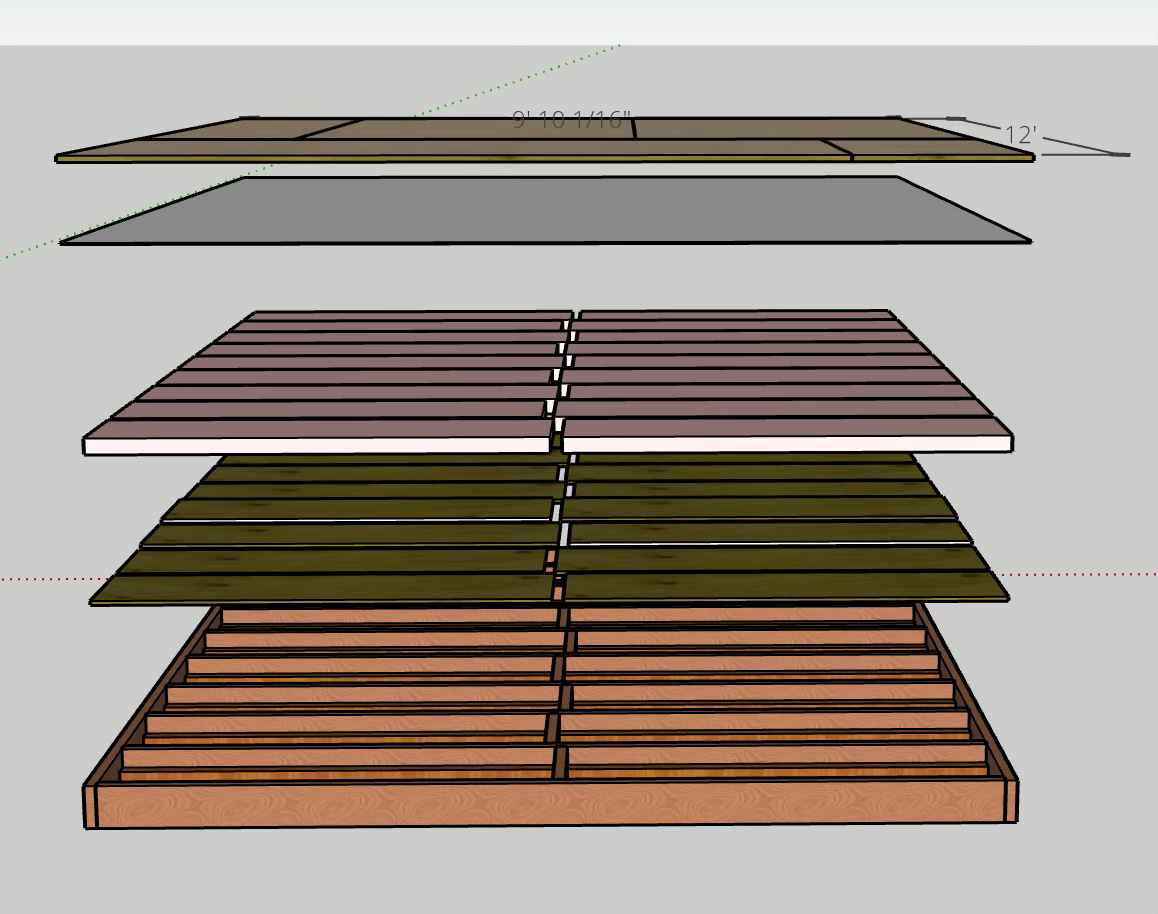
The floor that I’ve designed is meant to be decently built and insulated. This means that the cost of producing the floor will likely be three times (if not more) the cost of building a non-insulated floor and it will have a lot of components.
Here is a cross-section of all of the layers of my floor split apart:
*Just a quick disclaimer, I’m doing this as a well-researched layperson. I am not in construction, nor am I an engineer. Just a guy who wants to draw and dream about cabins. This is a design that works for me, and is only meant as an artistic concept and it may not work for your purposes. I recommend that, if you pursue an a-frame that you specify the design to your own purposes.
… And you first show it to someone who hasn’t accidentally chopped off his finger with an ax and who is better versed in building*
So with that out of the way and without further ado …
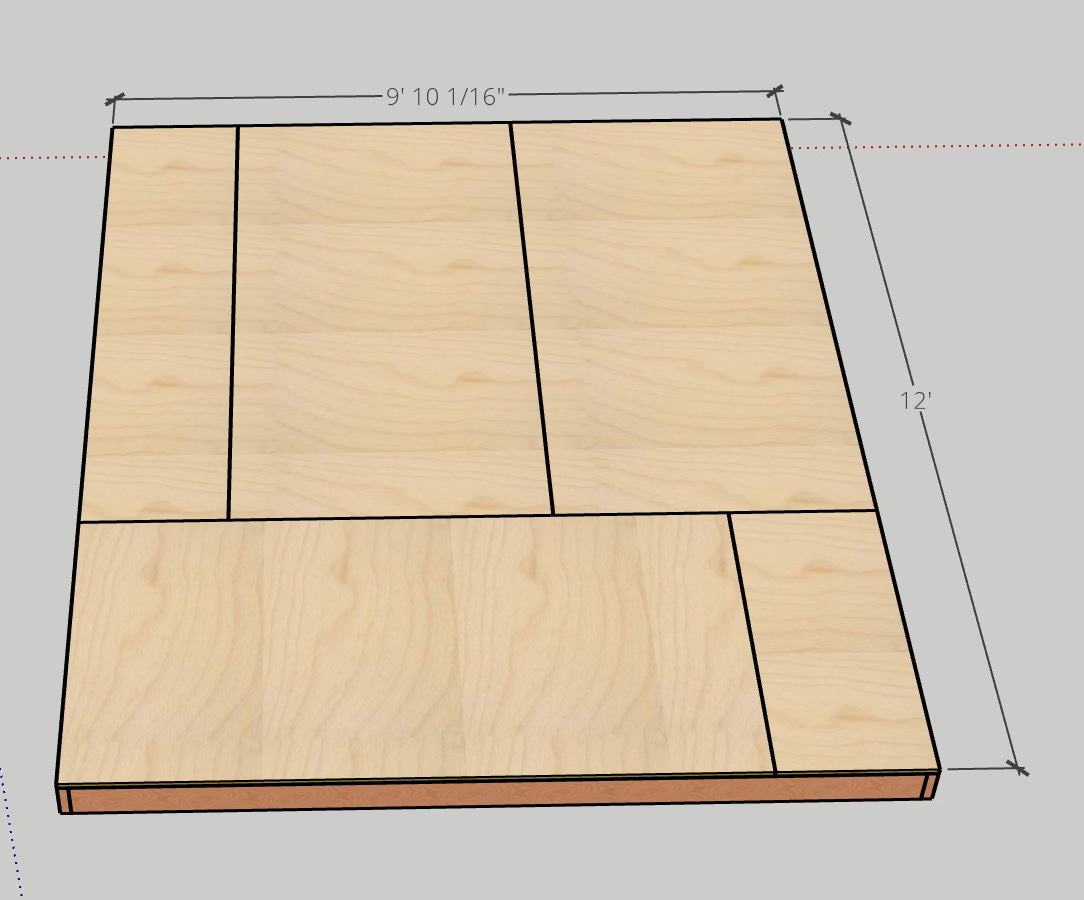
Step 1: Framing the Floor
The floor supports much of the weight of the A-frame. From what I understand, A-Frames distribute a fair degree of their structural load from the roof to the floor. As such, the structural integrity of the floor is one of the utmost import.
Keep reading with a 7-day free trial
Subscribe to Cabincore to keep reading this post and get 7 days of free access to the full post archives.