
Designing an A-Frame in Sketchup: Part 2, The A
Designing that which shelters our weary heads.

In case you haven’t been following along, I recently started sharing the progress of designing a very small A-Frame in SketchUp, a fairly simple (and free!) design software that is used all through out the design industry. The last post in this series was published on March 25, and you can find it here:

This week, I’m discussing the design I’ve put together for the “A” in the A-frame.
To Reiterate, this A-frame is super small and really will only have enough room for a couple peices of furnitre, some books and maybe a coffee brewing apparatus. The idea was to design a sort of forest escape where one can read or do their work, maybe even spend a night or two. If all else fails, perhaps it’ll just become an aesthetically pleasing place where you can store your garden tools.
In this issue, I’m planning on covering a few things for you:
The simple framing outline of the A in the A-frame
Window and door placements (spoiler: there’s only one of each)
An Excel cost sheet to give you a very rough estimate of how much a project like this might cost at a time like this.
Before I get too far, I have to insert an awkward, yet necessary disclaimer: Whatever the purpose the structure ends up being, I’m trying to design it decently well, but please note that I do not, nor have I ever worked in construction, engineering or architecture. So this is a layperson’s attempt to design a very simple shelter. This design is done purely for creative pursuits to showcase how I think about design and functionality. This structure is also not designed with any specific permitting codes in mind, so just bear that in mind that your county or locale may have very specific requirements even for this small structure.
And without further ado …
Step 1: The Front Facade
The front facade framing is quite simple, mostly because most of it is composed of the door, which takes up roughly two thirds of the facade’s surface area. So it’s tough to really do much else with the left over space.
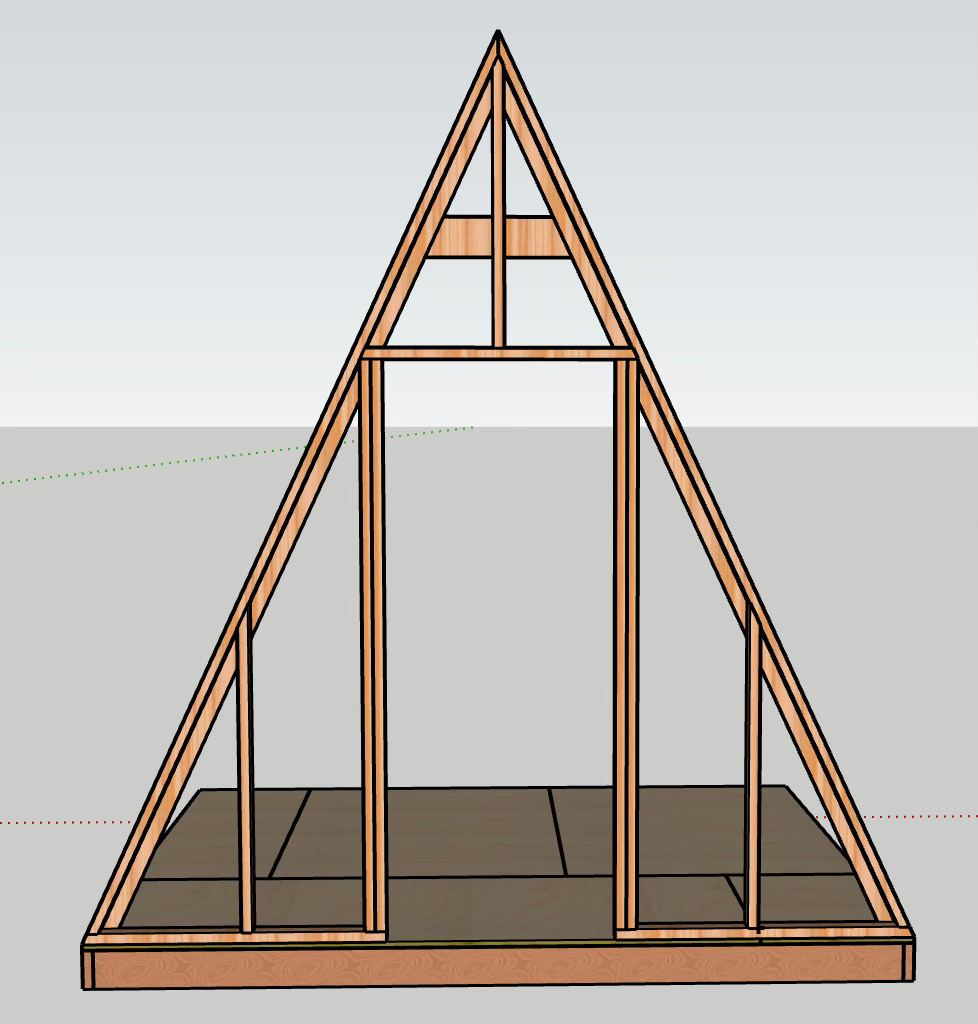
This facade is actually comprised of two indivdually framed A’s which can be seen in the below image that has them standing side-by-side. The one on the right (‘the A'‘) that is more representative of an ‘A’ slides directly behind the one on the left (‘the facade’) and they’ll be secured together. the purpose of this will become clear later (in the third post of the series).
